
Getting the most out of what’s available is a dark art when in comes to retrofitting electronics. But here I come with the flashlight. Two controls, a couple outputs if you’re lucky - and one hot electrified harp sitting at around 140V. That’s the starting point for the vast majority of Wurlitzer EPs. And while we do have an eye on the early 120s and 140s, the 200 series has always been in need of better amplification. To be fair, you could say that about most 50+ year old audio designs. And even the ones with enduring charms still often hold dubious drawbacks.
Drawbacks and drawing boards: If you look at early Wurlitzer tube amps all the way up to the 145 tube amplifier the biggest thing that stands out as technician or engineer is just how little Wurlitzer seemed to care about noise. They were a huge diverse company by this time and one that grew up in a time where a bit of noise was simply part and parcel with amplifiers. They did however evolve through the 60’s and 70’s as components improved. But notably they also refined their implementation and layout to reduce noise. They went from long cabling runs to a compact centralized rail with a preamp in close proximity to the controls. They (finally) added a shielding tube in the 200A to cover the AC wires running directly beneath the preamp. And they introduced additional shielding around the electrified comb to further reduce interference. And so for the time, they raised their standards to meet the demands and expectations of the day. But still, some issues remained. Like why is the transformer all the way across the rail? Why not run the power in the other side so you don’t need 2 feet of AC running back and forth under the preamp? And why is the AC power switch right on the back of the volume? Problematic proximity abounds. Some things can be changed and others can be tamed.
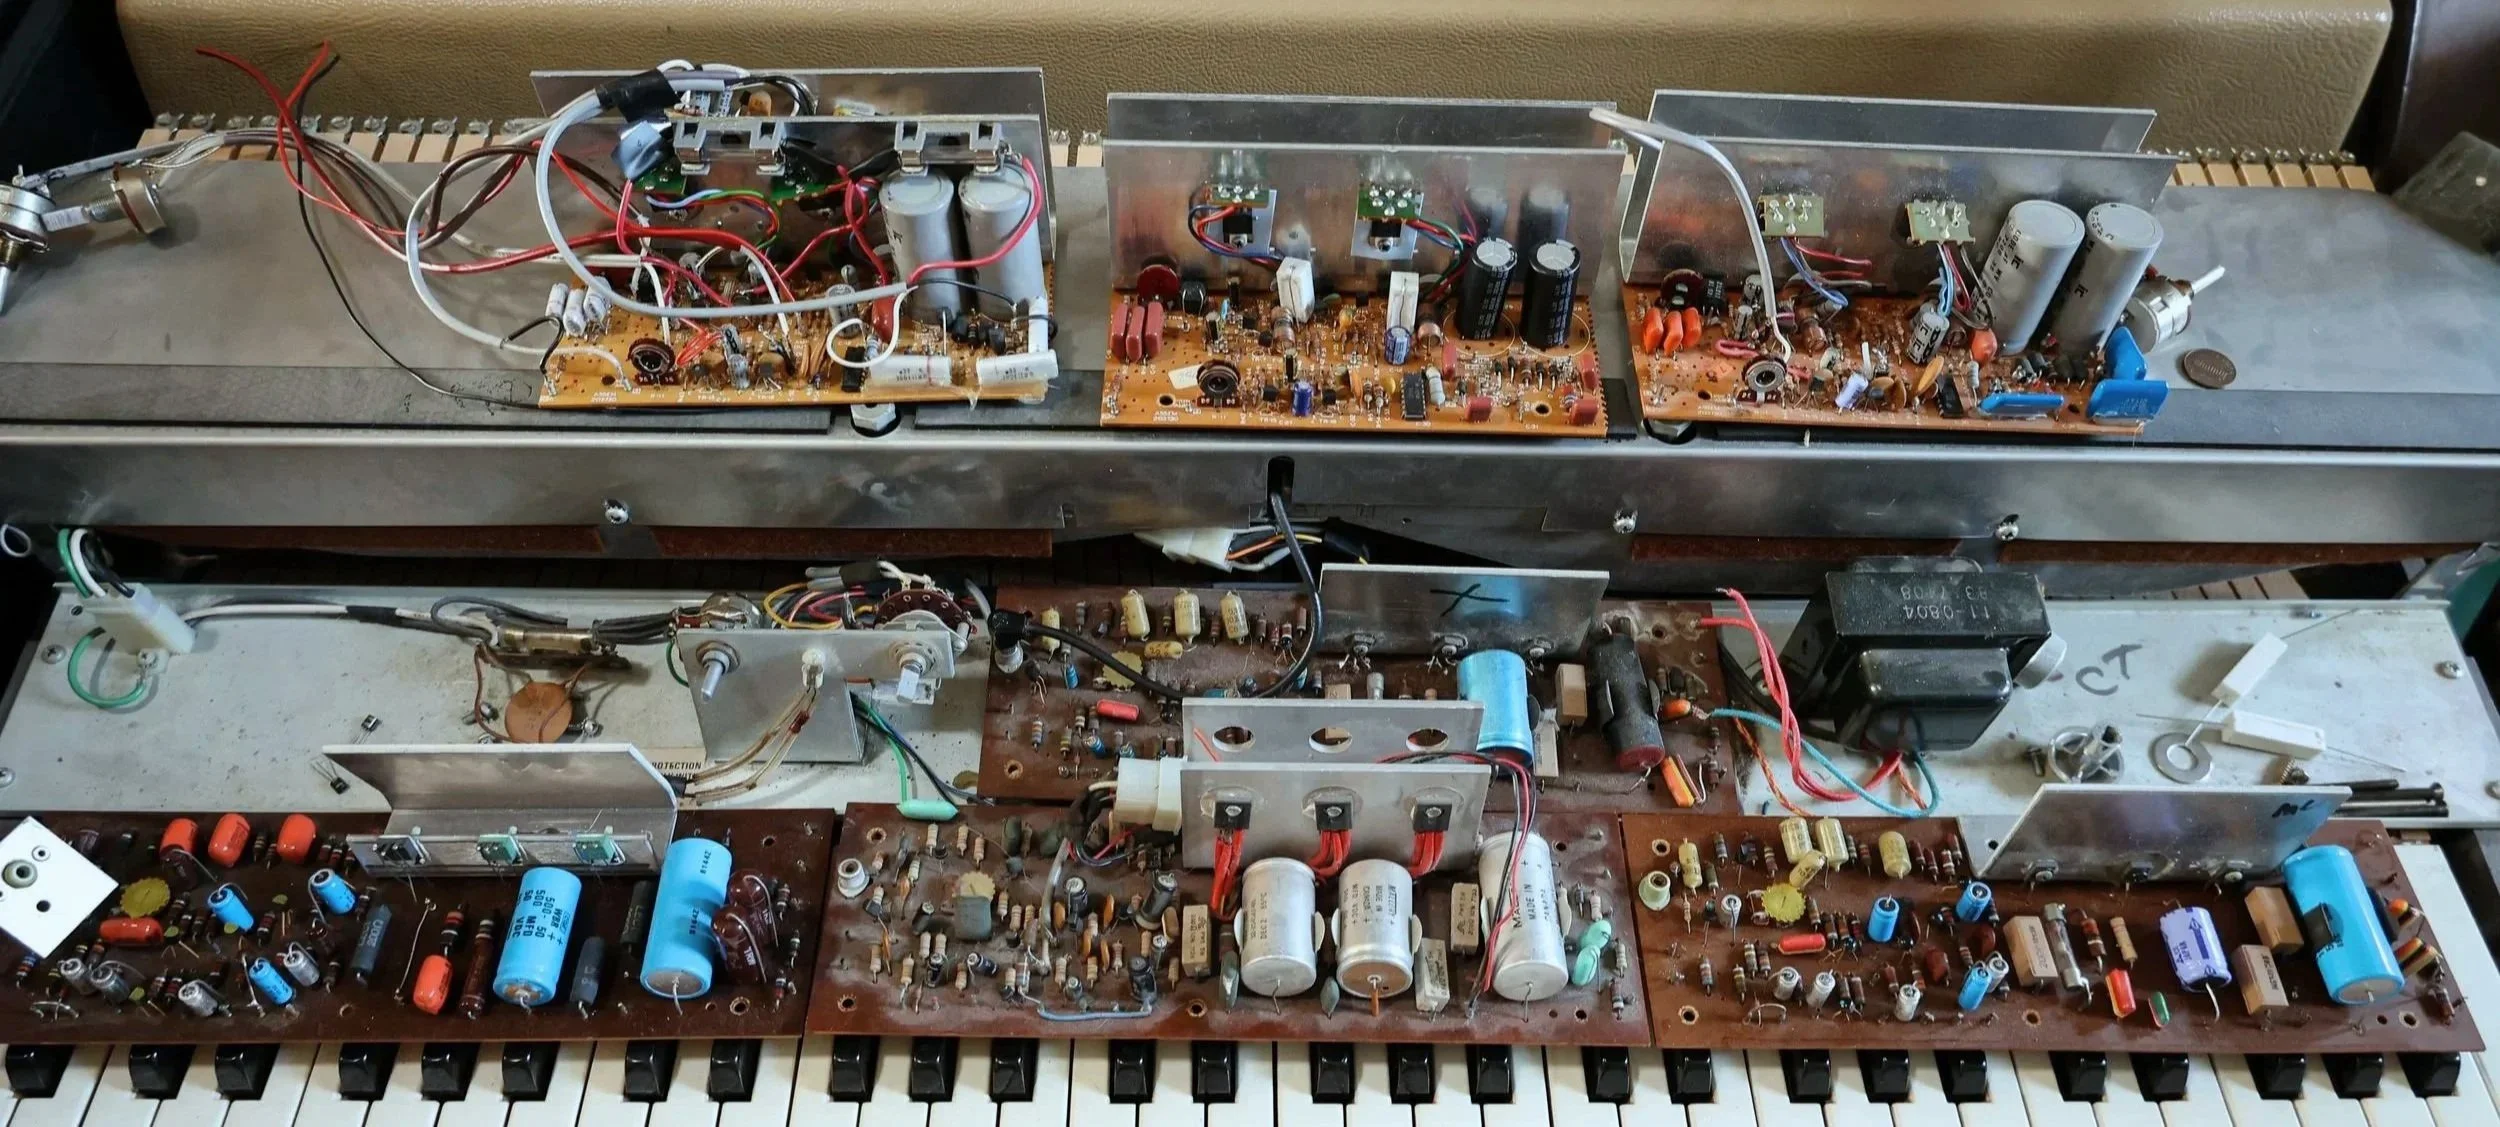
Original 200 and 200A amplifiers
Foibles: A lot of the time the constraints of design when retrofitting are a bigger challenge than the actual audio circuit. (spoiler, not really this time!) So within these confines - reducing the AC proximity while increasing the number and variety of controls and features was the central aim for the Reed Runner. Why just make a better amp when you could make an amp that isn’t just better, but does more while also installing with little to no modification - making it a true retrofit. And towards that end we did 3 major things. 1) Isolate and relocate the AC switch. 2) Use a custom overlaid faceplate, mini-pcbs and wiring harnesses to enable dual concentric pots to be lid mounted. 3) Stuff as many truly useful features as possible onto the PCB.
Pack It In - Technical Bins: With a mono/stereo tremolo and mono/stereo switch on board we needed a solid stereo amp. The brilliant Overture LM1876 was chosen - giving us about 9 very efficient watts RMS per channel. Slightly less on paper than the original - but cleaner and louder in real life. (You can also get more out of it by swapping to our 8ohm Wurli speakers.) Our highly-regarded RetroFlyer tremolo wave form was tried initially - but it didn’t translate well on a Wurli. So we scrapped that and went closer to the original Wurlitzer waveform. They got that pretty spot on - save perhaps a speed control. The pots are once again the made in the USA brass shaft dual concentric. 10k if you’re curious. Custom knobs made in the USA as usual. All the wiring in house, all through hole construction save the VCA stereo chips which only come in surface mount. But that’s just the basics. We have volume and variable tremolo covered but still one knob remaining. And this was the source of much discussion and redesign.
When you’re designing a full production unit, the question is not what do I like best? The question becomes what is the most useful to the most people. The broad answer is an FX loop - more on that in a later editions. The singular answer for that remaining knob was at first an overdrive. On paper the concern was what we were designing was going to be too clean. That the warmth and richness needed some over-driven transistors to capture the magic. But ultimately that was wrong. The real answer was tone.
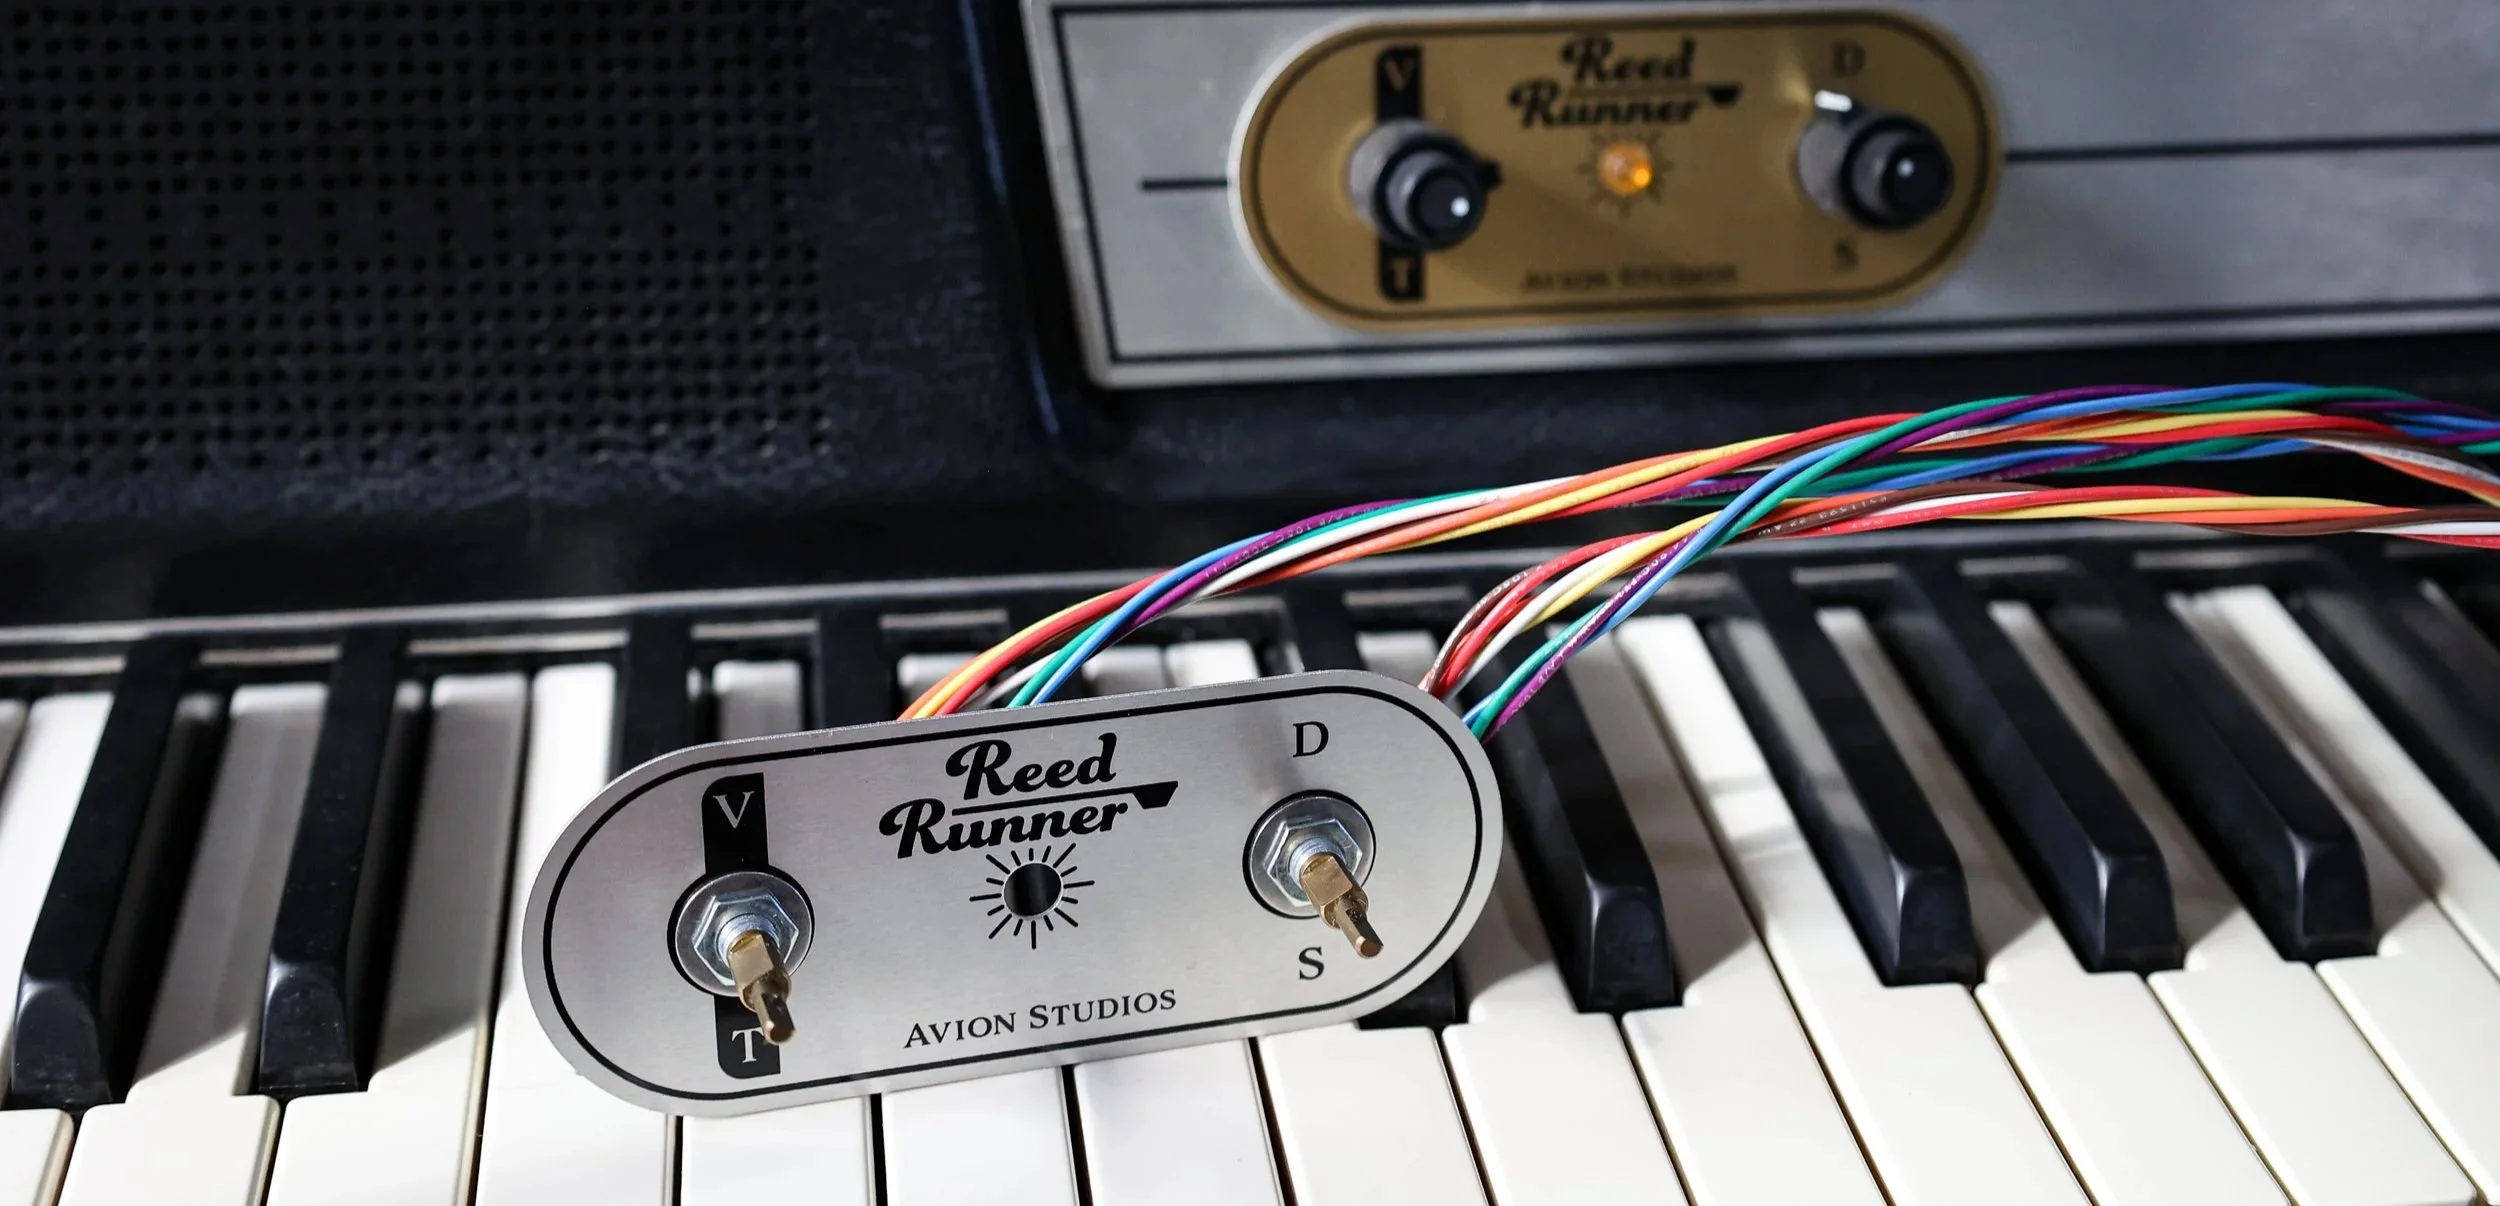
Made in USA faceplate, potentiometers, cables and knobs make this retrofit possible.
The Shape of Tone: Before we jump into tone shaping a note about the physics at play. The Wurlitzer EP is sort of a musical miracle in my view….in at least so much as they did any long standing production using this type of design. Whereas most EPs generate sounds using localized magnetic fields or transducers - these Wurlitzers are running 100+ volts across a giant fingered comb. And between those fingers are the reeds just waiting to be struck. So upon striking they disrupt this enormous and constant electrified field. It is a lot more like a large condenser microphone than a pickup array. And as such, our preamp section changed and incorporated some of those open field design principles. And I should also note - we added an additional voltage regulator to both lower noise and make the field as smooth/linear as possible. So once that reed gets running inside the cleanest electric field a Wurlitzer has even known, the voltage is filtered out and signal remains as the output from the comb to the preamp. Once that signal is in the preamp the big discovery was that unlike a Rhodes or other EPs that can sound decent when plugged directly from the source - the Wurlitzer EP is, in it’s natural form - a hot mess. Piercing highs, booming lows. But on the plus side, all that character we were so worried about missing didn’t come from the transistors, it came from the utter chaos of disturbing that electrified field. After we had reigned in the raw signal and with months of design and experimentation in tow, it was finally getting close to the point where we could confidently place lightning in a bottle. But to capture everything from the low distant rumble to hot crackle, we added a tone knob. You can set it back in the mix with a classic rounded vibe or bring it all the way forward with some cutting mids. It’s a simple concept - but it proved the most consistently helpful tool.
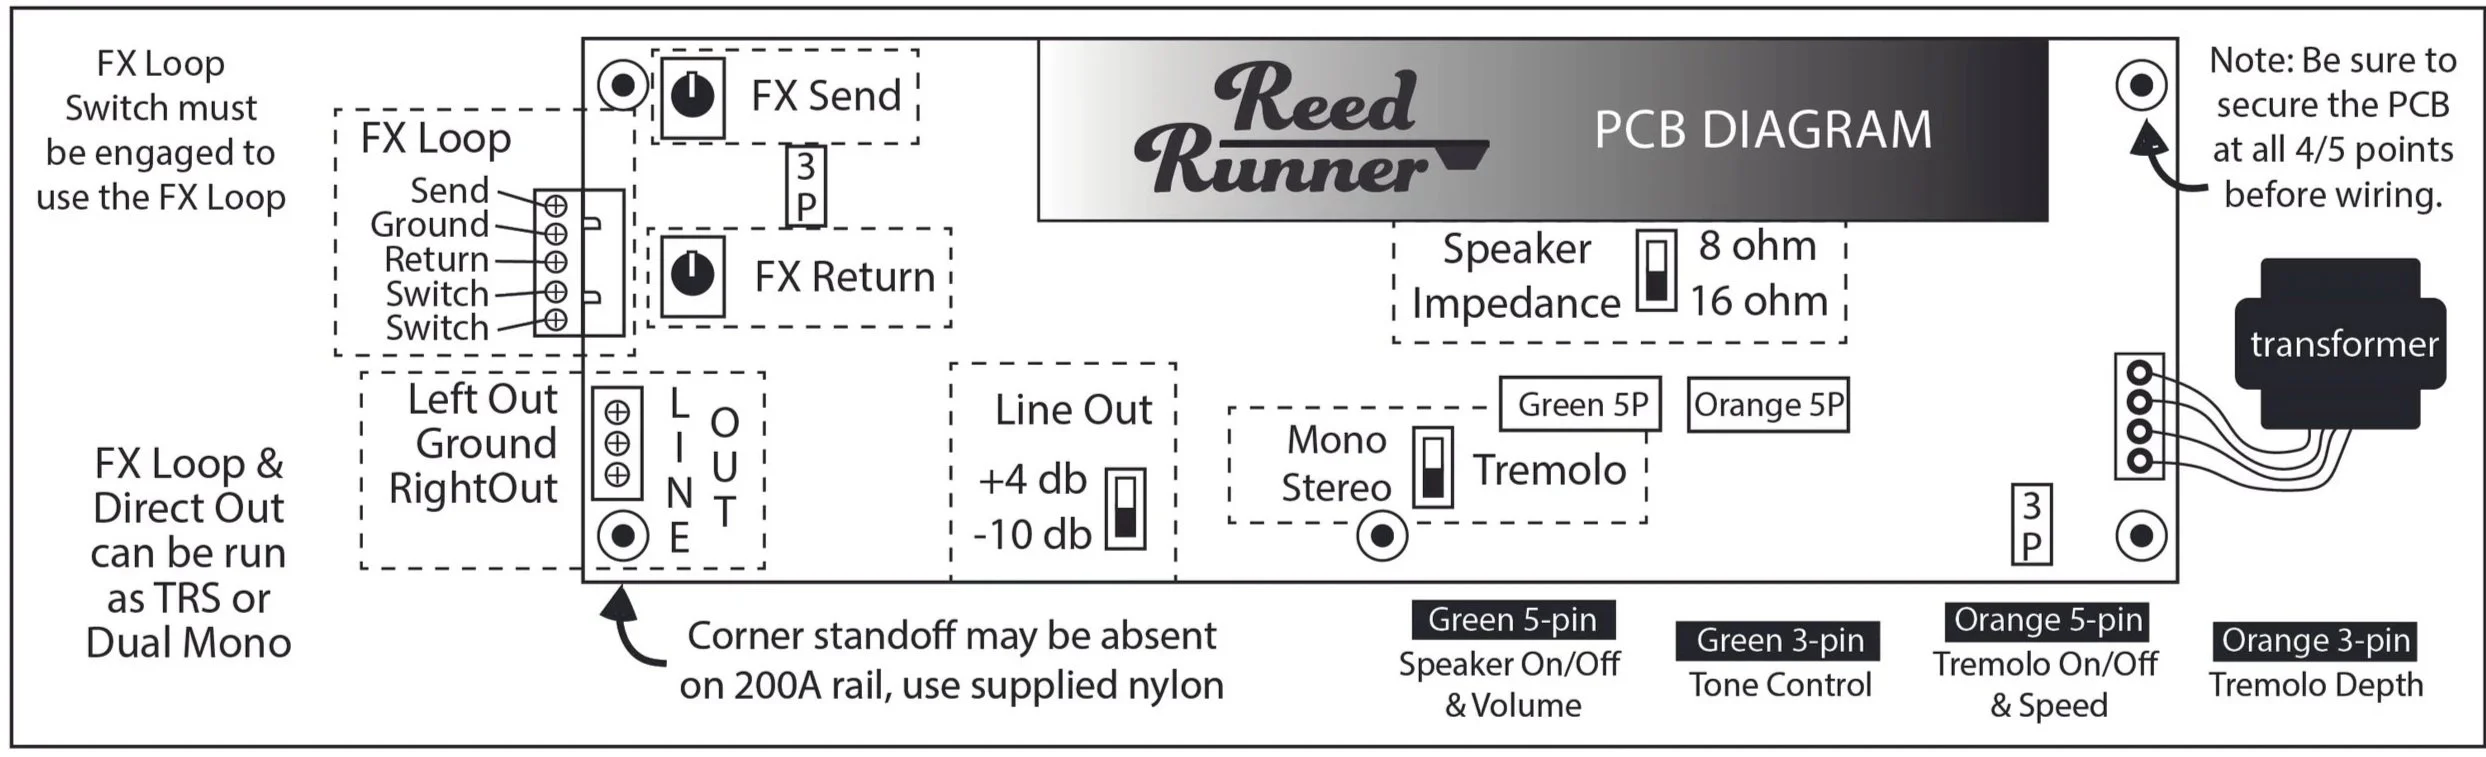
Manual excerpt showing PCB connections and controls.
Place the Whasit In the M’bobber: Another issue - there’s just too much variation in the 200 lineup. Too many possibilities. So what do you do? In the case of the Reed Runner you put everything on a single PCB design and then vary the connections and cabling. It’s a production efficiency. It’s flexible plug and play. And it’s the gift that keeps on giving - because it can grow with your needs. Some 200 series have but one output, while the 200A has a spot for the switch, and two panel holes. Then there’s all the oddball 270, 215, 214, 206 and so on. But with terminals, plug connectors and variable wiring harnesses you can run your outputs and FX loop in a variety of ways. So much so that it's truly its own topic. (and well detailed in the manual)
We added a stereo Direct Out but to maximize the usefulness we made it switchable between +4db and -10db. We added individual speaker outputs and then followed that with an impedance switch so you could run 8ohm speakers too. And how about the FX loop? Not only did we fully buffer it, we added send and return gain knobs. So in practical function, while these inner switches and dials are not immediately accessible, having them on hand to set up for your session makes the Reed Runner so incredibly compatible with so many use cases and installation formats. And while it is a more complex install than our ever popular RetroFlyer, the Reed Runner is also very much plug and play with preinstalled (and color coded) connectors and couplers. And the irony in all these installer friendly components is that it also makes it very DIY friendly. Wherein you could potentially reroute or re-cable all the connections as desired with relative ease.
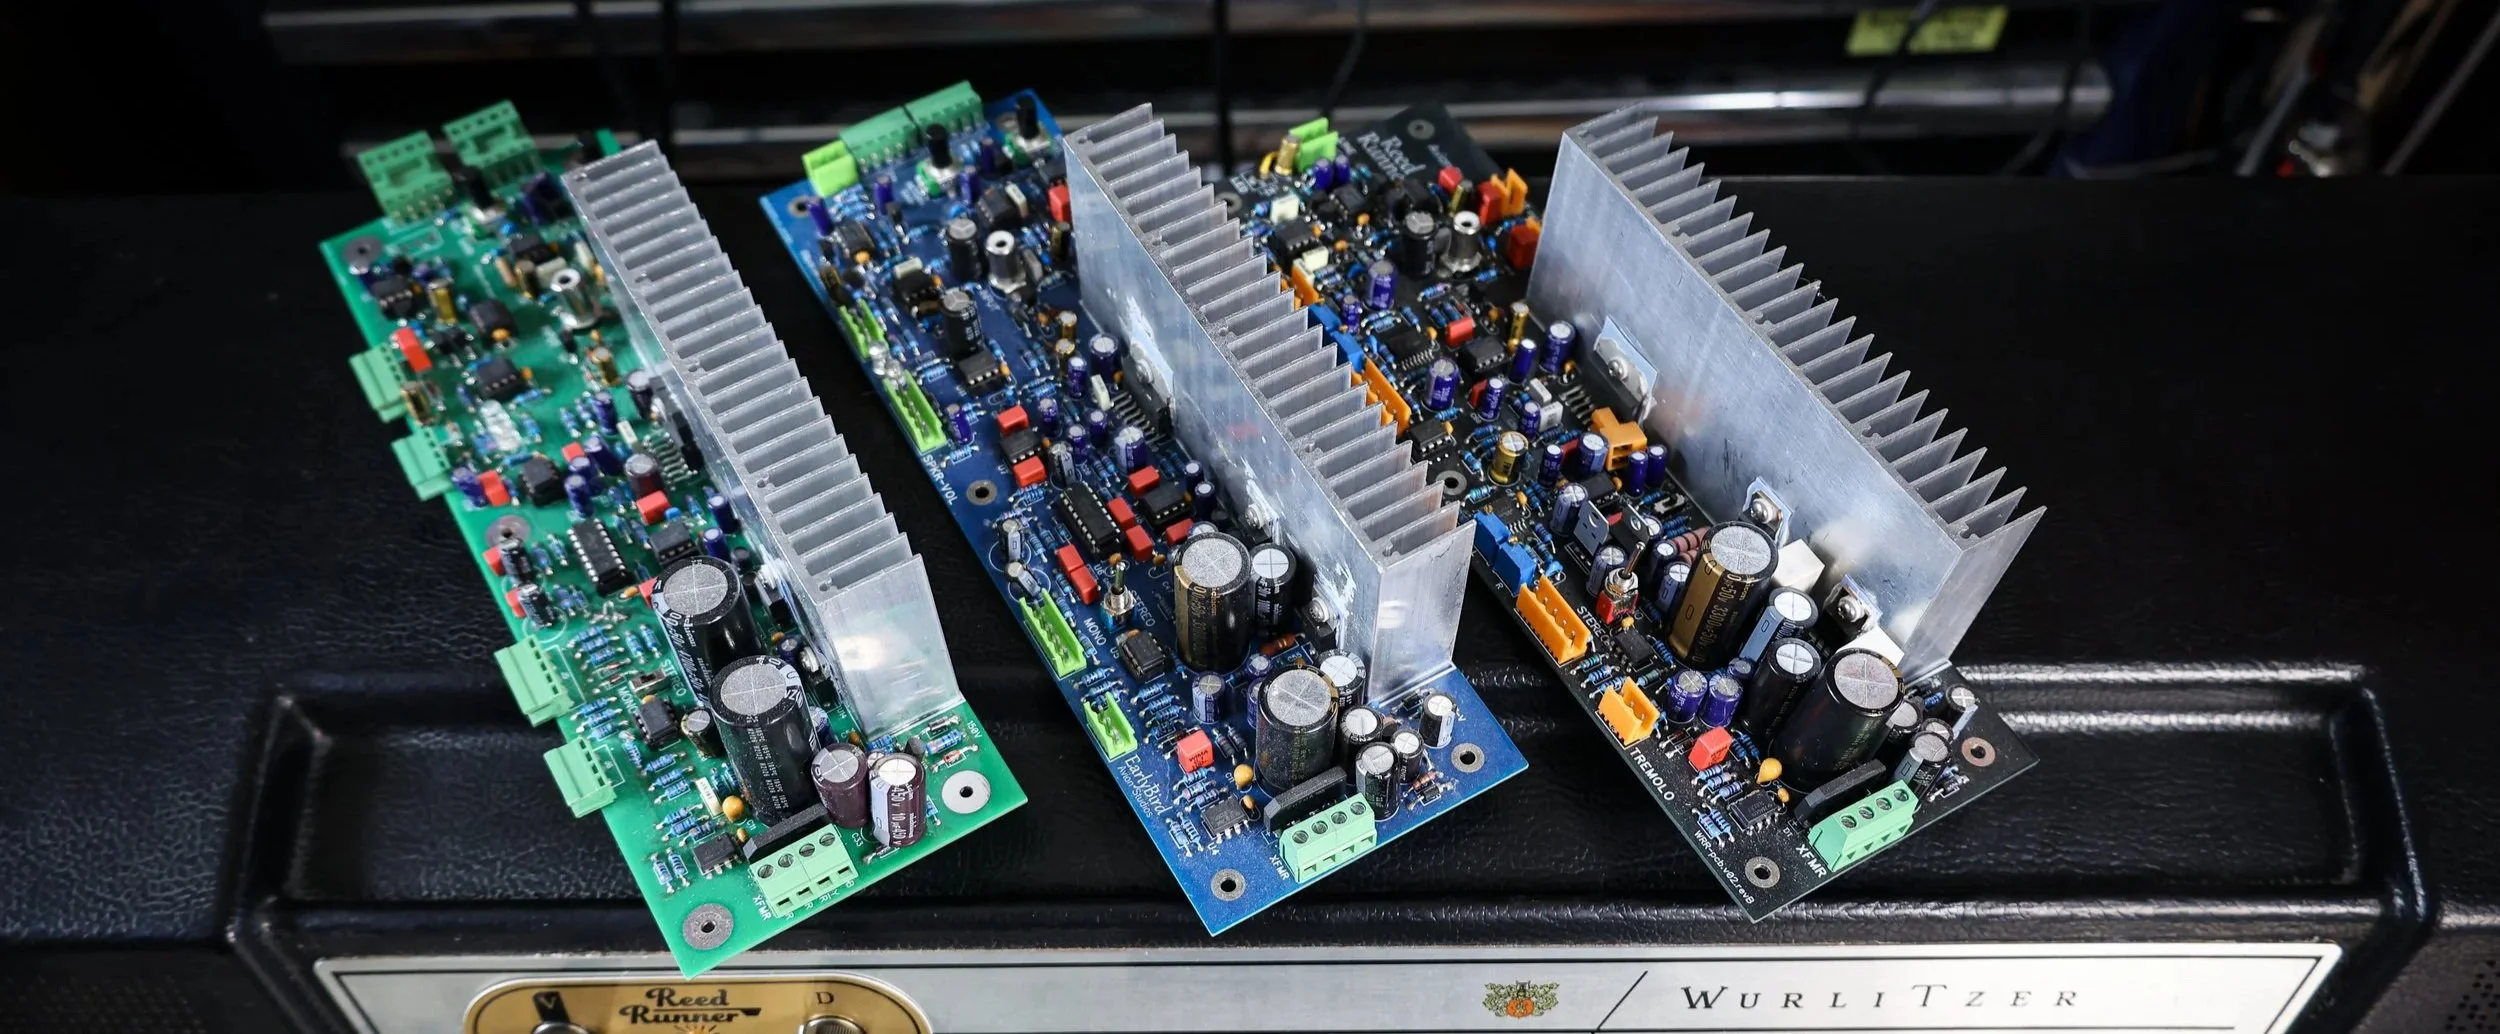
Failed designs along the way.
Final Hurdles: So the saying goes, “you have to crawl before you can run”. Ok, maybe the expression is about walking, but this felt much more like a crawl. And they forget to mention that after you crawl (walk) you still have to fall down over and over. That’s a fair summary of the final mile of design for the Reed Runner. We knew how to shape the tone and pack the features but we had persistent routing and layout issues. It is an incredibly dense PCB as a result of all those features and with the constraints of size and general arrangement we struggled mightily with several theoretically capable but audibly disappointing designs. Thankfully there is a silver lining in that last mile. We continued to refine features, installation, tone shaping and gain staging throughout. And when we finally made the hard decision to redesign on a 4-layer PCB, we had come farther than we would have if it was an easy journey. Maybe there’s a lesson in there about old things teaching us to slow down. But nearly two years, 4 production ready failures and countless revisions later, the Reed Runner is finally what it needs to be. And I hope it was worth the long haul. But truly, as with any our designs I hope all the words on this page fall away and like all good audio tools - the Reed Runner helps you get more out of your Wurlitzer. To play more, get better recordings, expand the sound and run deeper into a unique instrument that is well worth giving new life. Thanks for reading and happy running. Morgen @ Avion